Last Updated by RgbHouse.com on 2025-07-24

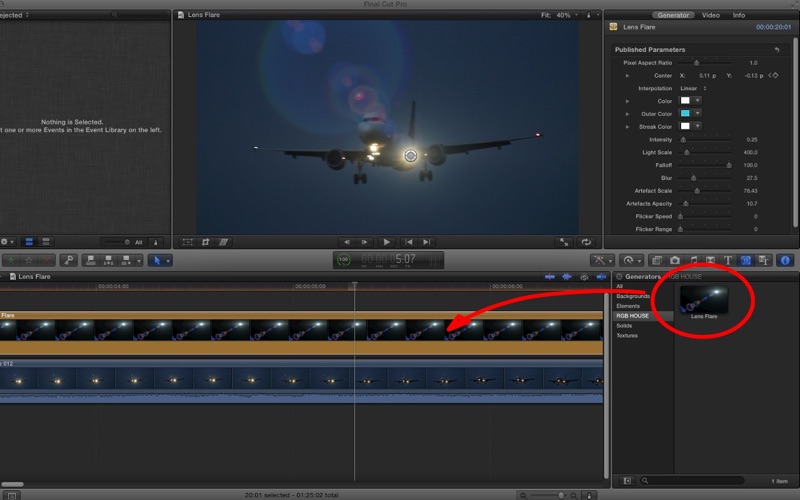
1. How it works ? – In Final Cut Pro you will find in Generators RGB HOUSE group, where will be Lens Flare.
2. Write a generator name - Lens Flare and choose category RGB HOUSE or make it.
3. System requirements ? - Lion and Final Cut Pro X or Motion 5, rendering time depends on your machine.
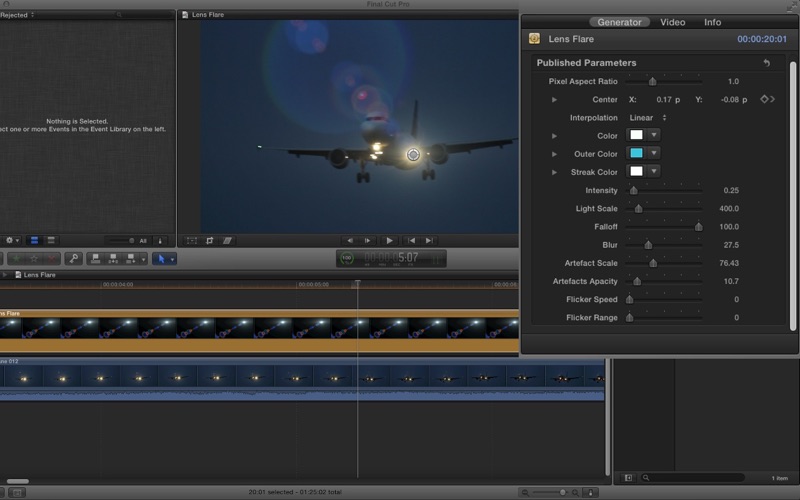
4. You can adjust color, steak color, glow, intensity, scale - apacity and blur of artifacts, position.
5. If you don’t have Motion 5 look at support site - how to install in FCP.
6. When Motion is open click save as.
7. When it’s there remember to change blending mode to Screen (in video section).
8. How install it ? – click the launch button.
9. Any parameter could be stored as a keyframe, so You can easily animate the flare.
10. Motion 5 will start itself.
11. Drag this generator above all clips in timeline.
12. Liked Lens Flare? here are 5 Photo & Video apps like Flare - For Groups; FX.X Lens.Light Flare Effect.s; Lens Light - flare effects; Flare Effects; Pic Flare - A beautiful photo enhancer with creative insta lens flare FX filters;
Or follow the guide below to use on PC:
Select Windows version:
Install Lens Flare for Final Cut Pro app on your Windows in 4 steps below:
Download a Compatible APK for PC
| Download | Developer | Rating | Current version |
|---|---|---|---|
| Get APK for PC → | RgbHouse.com | 1 | 1.0 |
Download on Android: Download Android
Don’t buy for Final Cut Pro!!!!
It isn’t for final cut pro. Its for Motion 5.
I just need a refund, and that’s all...
 PC Apps