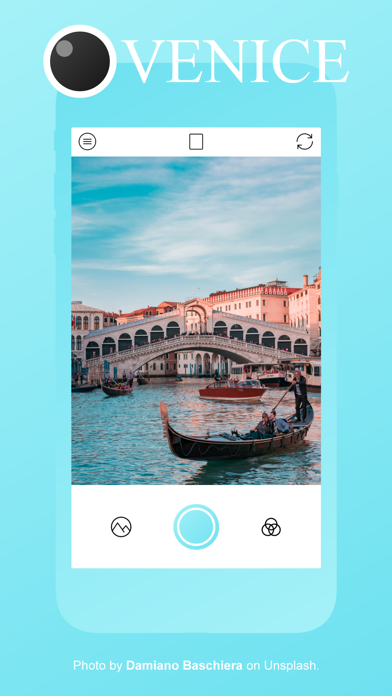
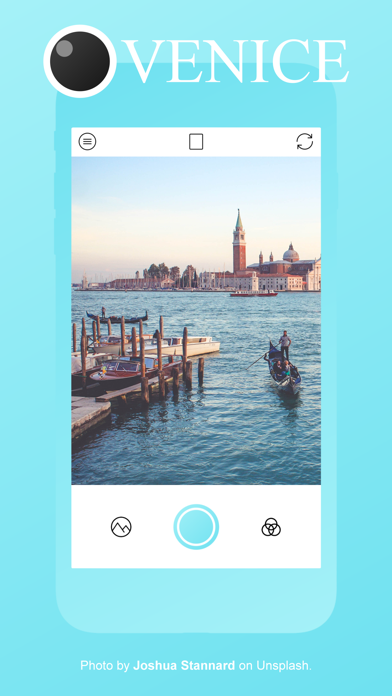
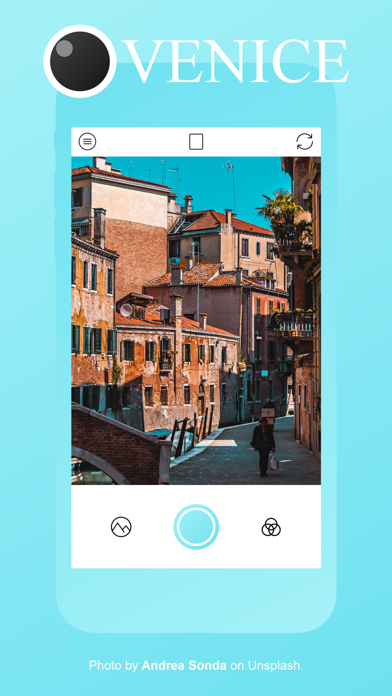
1. Download Visual Venice and take a photo.
2. Visual Venice is the 3rd product of Visual Series.
3. Only thing you need to do is to open it and click shutter button.
4. When you don't like the suggested filter, just swipe horizontally and you can change the filter.
5. There are total 10 filters for you to choose for different scene.
6. This is a camera app with 10 special filters.
7. You can easily take a photo with the app.
8. Liked Visual Venice? here are 5 Photo & Video apps like Visual Money; Wizibel - Audio Visualizer; VISUALS - Image Split Frames; VisualX Photo Editor & Effects;
Hurray! Seems an app like visual venice is available for Windows! Download below:
SN |
App |
Download |
Review |
Maker |
1 |
Visual Timers
|
Download |
3.9/5
91 Reviews
3.9
|
Abilities Software Inc. |
2 |
Marker.io: Visual bug reporting tool
|
Download |
2.6/5
21 Reviews
2.6
|
Marker.io |
3 |
Visual RPN Calculator
|
Download |
3.9/5
17 Reviews
3.9
|
Vizisolve |
Not satisfied? Check for compatible PC Apps or Alternatives
Or follow the guide below to use on PC:
Select Windows version:
- Windows 7-10
- Windows 11
Download and install the Visual Venice app on your Windows 10,8,7 or Mac in 4 simple steps below:
- Download an Android emulator for PC and Mac:
Get either Bluestacks or the Nox App >> . We recommend Bluestacks because you can easily find solutions online if you run into problems while using it. Download Bluestacks Pc or Mac software Here >> .
- Install the emulator on your PC or Mac:
On your computer, goto the Downloads folder » click to install Bluestacks.exe or Nox.exe » Accept the License Agreements » Follow the on-screen prompts to complete installation.
- Using Visual Venice on PC [Windows 7/ 8/8.1/ 10/ 11]:
- Open the Emulator app you installed » goto its search bar and search "Visual Venice"
- The search will reveal the Visual Venice app icon. Open, then click "Install".
- Once Visual Venice is downloaded inside the emulator, locate/click the "All apps" icon to access a page containing all your installed applications including Visual Venice.
- Now enjoy Visual Venice on PC.
- Using Visual Venice on Mac OS:
Install Visual Venice on your Mac using the same steps for Windows OS above.
To get Visual Venice on Windows 11, check if there's a native Visual Venice Windows app here » ». If none, follow the steps below:
- Download the Amazon-Appstore » (U.S only)
- Click on "Get" to begin installation. It also automatically installs Windows Subsystem for Android.
- After installation, Goto Windows Start Menu or Apps list » Open the Amazon Appstore » Login (with Amazon account)
- For non-U.S users, Download the OpenPC software »
- Upon installation, open OpenPC app » goto Playstore on PC » click Configure_Download. This will auto-download Google Play Store on your Windows 11.
- Installing Visual Venice:
- Login to your computer's PlayStore or Amazon AppStore.
- Search for "Visual Venice" » Click "Install" to install Visual Venice
- Visual Venice will now be available on your windows start-menu.
Minimum requirements |
Recommended |
- 8GB RAM
- SSD Storage
- Processor: Intel Core i3, AMD Ryzen 3000
- Architecture: x64 or ARM64
|
|
Visual Venice On iTunes
Download |
Developer |
Rating |
Score |
Current version |
Adult Ranking |
Free On iTunes |
Refinery Apps, LLC |
2 |
5 |
1.0 |
4+ |
Download on Android: Download Android