Photo Pixelizer for pc and mac

Photo Pixelizer for Pc

Written by Nekomimimi


Get a Compatible APK for PC


Download Developer Rating Score Current version Adult Ranking
Check for APK → Nekomimimi 20 3.2 1.0.2 4+

App Screenshots


Software Features and Description

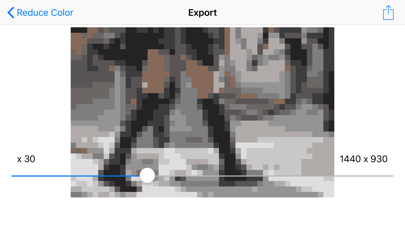
1. Select your photo, set a pixel art size, reduce resolution and color, and you will create a pixel art.

2. A photo is saved in png format to prevent color bleeding, When you exports a photo.

3. "Pixel art conv." is a dedicated app to make a pixel art from a photo.

4. Liked Photo Pixelizer? here are 5 Photo & Video apps like Photo Pixelizer App; Facepixelizer: Censor Photo; Tezza: Aesthetic Photo Editor; Mextures Photo Editor; DSLR Camera-Photo Blur Effects;


Download and install Photo Pixelizer on your computer


Hurray! Seems an app like photo pixelizer is available for Windows! Download below:

SN App Download Review Maker
1 Pixel Art - Color by number coloring book Download 4.6/5
889 Reviews
4.6
Riz
2 Sandbox Coloring Pixel Art - Color by numbers Download 4.5/5
572 Reviews
4.5
Riz
3 Pixel Art Studio Download 4.5/5
507 Reviews
4.5
Gritsenko

Not satisfied? Check for compatible PC Apps or Alternatives


App Download Rating Maker
pc app photo pixelizer Get App or Alternatives 20 Reviews
3.2
Nekomimimi
Or follow the guide below to use on PC:

Select Windows version:

  1. Windows 7-10
  2. Windows 11

Download and install the Photo Pixelizer app on your Windows 10,8,7 or Mac in 4 simple steps below:


  1. Download an Android emulator for PC and Mac:
    Get either Bluestacks or the Nox App >> . We recommend Bluestacks because you can easily find solutions online if you run into problems while using it. Download Bluestacks Pc or Mac software Here >> .

  2. Install the emulator on your PC or Mac:
    On your computer, goto the Downloads folder » click to install Bluestacks.exe or Nox.exe » Accept the License Agreements » Follow the on-screen prompts to complete installation.

  3. Using Photo Pixelizer on PC [Windows 7/ 8/8.1/ 10/ 11]:
    • Open the Emulator app you installed » goto its search bar and search "Photo Pixelizer"
    • The search will reveal the Photo Pixelizer app icon. Open, then click "Install".
    • Once Photo Pixelizer is downloaded inside the emulator, locate/click the "All apps" icon to access a page containing all your installed applications including Photo Pixelizer.
    • Now enjoy Photo Pixelizer on PC.

  4. Using Photo Pixelizer on Mac OS:
    Install Photo Pixelizer on your Mac using the same steps for Windows OS above.


How to download and use Photo Pixelizer App on Windows 11


To get Photo Pixelizer on Windows 11, check if there's a native Photo Pixelizer Windows app here » ». If none, follow the steps below:


  1. Download the Amazon-Appstore » (U.S only)
    • Click on "Get" to begin installation. It also automatically installs Windows Subsystem for Android.
    • After installation, Goto Windows Start Menu or Apps list » Open the Amazon Appstore » Login (with Amazon account)

  2. For non-U.S users, Download the OpenPC software »
    • Upon installation, open OpenPC app » goto Playstore on PC » click Configure_Download. This will auto-download Google Play Store on your Windows 11.

  3. Installing Photo Pixelizer:
    • Login to your computer's PlayStore or Amazon AppStore.
    • Search for "Photo Pixelizer" » Click "Install" to install Photo Pixelizer
    • Photo Pixelizer will now be available on your windows start-menu.

Minimum requirements Recommended
  • 8GB RAM
  • SSD Storage
  • Processor: Intel Core i3, AMD Ryzen 3000
  • Architecture: x64 or ARM64
  • 16GB RAM
  • HDD Storage

Photo Pixelizer On iTunes


Download Developer Rating Score Current version Adult Ranking
Free On iTunes Nekomimimi 20 3.2 1.0.2 4+

Download on Android: Download Android


Top Pcmac Reviews

  • Ads

    By \-_-/\-_-/\-_-/ (Pcmac user)

    I want to give this app 5 stars. It's basic but does exactly what you'd want. Step 1: load in an image. Step 2: choose the resolution (slider with numbers) Step 3: choose how many colors (it'd be nice to be able to swap colors) Step 4: choose output resolution (clean upscaling) Then, unfortunately there's step 5. Watch an ad... Ugh. Why? I've never before wished for a paid version of an app before now. If they add in a color picker (ideally), I'd gladly pay a few $ to unlock an add free version. Unfortunately, with the rather intrusive ads now, I can't give this app a rating higher than 3.

Similar Photo & Video apps


More apps from the Developer