
ลงรายการบัญชีโดย ลงรายการบัญชีโดย Christoffer Winterkvist
1. If your project is organised across multiple directories, after you have selected the main project, you can add directories to be watched for file changes using the "Add Directory" menu item.
2. InjectionIII requires a version of Xcode more recent than 10.2, installed at the standard location /Applications/Xcode.app. For a project to be injectable, you must also add "-Xlinker -interposable" to the Debug target of its "Other Linker Flags" build setting.
3. You’ll be promoted to select the directory containing the project file and sources to give InjectionIII access to which files have changed.
4. InjectionIII is able to inject SwiftUI but requires minor code changes to "body" properties to ensure views are redrawn on injection.
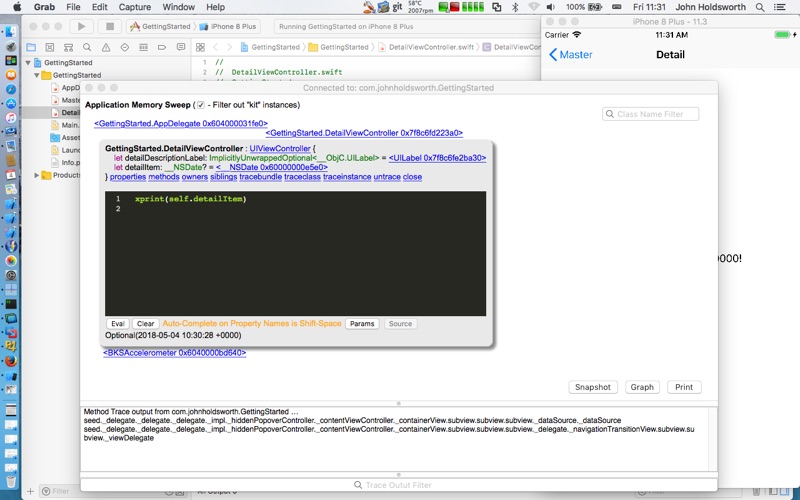
5. This allows you to change the implementations of methods, functions and SwiftUI body properties without having to restart your app for rapid iteration over minor code changes and design.
6. The easiest way to do this is using the "Prepare Project" menu item after you have selected a project and it will make the necessary changes.
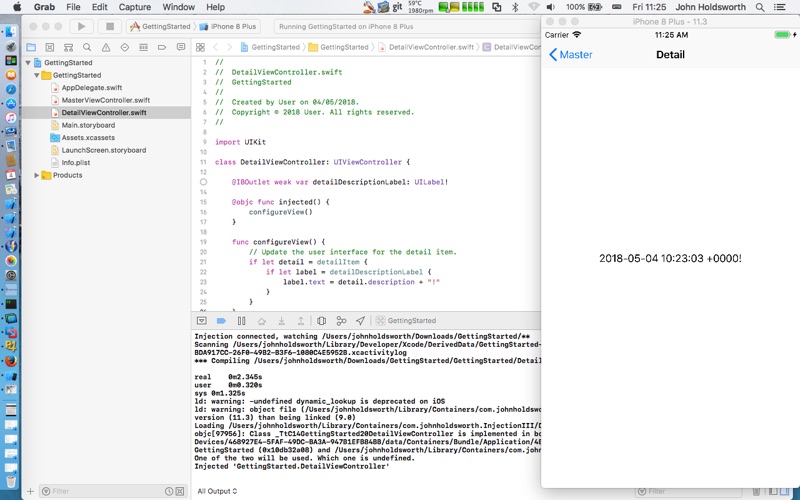
7. In the GettingStarted iOS app, if you edit the file DetailViewController.swift to change the string appended after the detail.description in function configureView() then save the file, you can see it take effect straight away.
8. Once injection has connected, when you save a file, it will be recompiled and injected into the running app, the new implementations taking place of the old.
9. Quite simply, InjectionIII adds "Hot Reloading" capability to your iOS, tvOS and macOS projects written in Swift or Objective-C.
10. Then, download the example project build and run it in Xcode.
11. Consult the project README on the support page for more information.
ตรวจสอบแอปพีซีหรือทางเลือกอื่นที่เข้ากันได้
| โปรแกรม ประยุกต์ | ดาวน์โหลด | การจัดอันดับ | เผยแพร่โดย |
|---|---|---|---|
|
InjectionIII
|
รับแอปหรือทางเลือกอื่น ↲ | 0 1
|
Christoffer Winterkvist |
หรือทำตามคำแนะนำด้านล่างเพื่อใช้บนพีซี :
เลือกเวอร์ชันพีซีของคุณ:
ข้อกำหนดในการติดตั้งซอฟต์แวร์:
พร้อมให้ดาวน์โหลดโดยตรง ดาวน์โหลดด้านล่าง:
ตอนนี้เปิดแอพลิเคชัน Emulator ที่คุณได้ติดตั้งและมองหาแถบการค้นหาของ เมื่อคุณพบว่า, ชนิด InjectionIII ในแถบค้นหาและกดค้นหา. คลิก InjectionIIIไอคอนโปรแกรมประยุกต์. InjectionIII ในร้านค้า Google Play จะเปิดขึ้นและจะแสดงร้านค้าในซอฟต์แวร์ emulator ของคุณ. ตอนนี้, กดปุ่มติดตั้งและชอบบนอุปกรณ์ iPhone หรือ Android, โปรแกรมของคุณจะเริ่มต้นการดาวน์โหลด. ตอนนี้เราทุกคนทำ
คุณจะเห็นไอคอนที่เรียกว่า "แอปทั้งหมด "
คลิกที่มันและมันจะนำคุณไปยังหน้าที่มีโปรแกรมที่ติดตั้งทั้งหมดของคุณ
คุณควรเห็นการร
คุณควรเห็นการ ไอ คอน คลิกที่มันและเริ่มต้นการใช้แอพลิเคชัน.
รับ APK ที่เข้ากันได้สำหรับพีซี
| ดาวน์โหลด | เผยแพร่โดย | การจัดอันดับ | รุ่นปัจจุบัน |
|---|---|---|---|
| ดาวน์โหลด APK สำหรับพีซี » | Christoffer Winterkvist | 1 | 4.7.5 |
ดาวน์โหลด InjectionIII สำหรับ Mac OS (Apple)
| ดาวน์โหลด | เผยแพร่โดย | ความคิดเห็น | การจัดอันดับ |
|---|---|---|---|
| Free สำหรับ Mac OS | Christoffer Winterkvist | 0 | 1 |

Python3IDE
Scriptable

Eye4 Plus

GitHub

App Store Connect

API Tester: Debug requests

SUNFAMILY

Programming Notebook LITE

Apple Developer

Koder Code Editor

Bluetooth Terminal

Pineapple - Build Apps

Stream - Network Debug Tool

Redbox Toolbox - ASO Analysis

Text Editor.
 PcMac ไทย