
投稿者 Moleskine Srl
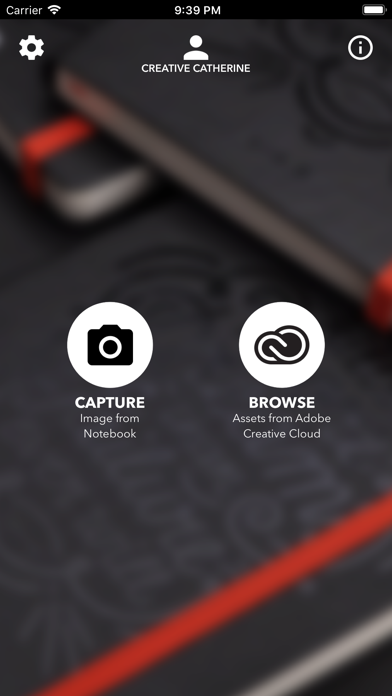
1. Draw on any custom page of the Moleskine Smart Notebook then take a picture of your drawing using the Moleskine App.
2. With the Moleskine Smart Notebook and Moleskine App, Creative Cloud connected products by Moleskine, it’s easy to take your initial ideas to finished design.
3. After you’ve synced your files, you can open and edit them in Adobe Illustrator and Adobe Photoshop — or refine and utilize the JPG files in other Creative Cloud desktop and mobile applications.
4. The free Moleskine, a Creative Cloud connected app gives you the ability to instantly turn hand-drawn sketches into fully workable digital files within the Creative Cloud.
5. Use the free Moleskine, a Creative Cloud connected app to take a picture of your drawing.
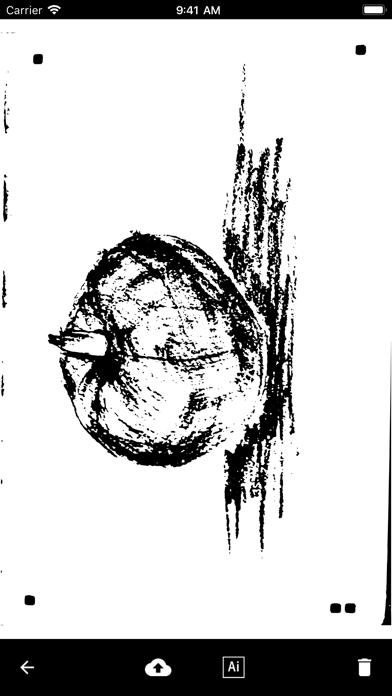
6. The special page markings in the notebook allow the app to process and optimize the image as a JPG file before converting it to an SVG file.
7. Draw on any page in the notebook using any tool of your choice, although black ink and markers tend to work best.
8. With an Adobe Creative Cloud membership, easily sync your artwork to the Creative Cloud and open them for refinement in Adobe Illustrator CC or Adobe Photoshop CC.
9. Sync with Creative Cloud to store both files formats (JPG and SVG) in your Creative Cloud Assets folder.
10. The app uses the special page markings to help process and optimize the image.
11. The preprocessing actions are specifically developed to detect the orientation of the page, correct perspective and alignment distortions.


または、以下のガイドに従ってPCで使用します :
PCのバージョンを選択してください:
インストールして使用したい場合は Moleskine, for Creative Cloud あなたのPCまたはMac上のアプリをダウンロードするには、お使いのコンピュータ用のデスクトップアプリケーションエミュレータをダウンロードしてインストールする必要があります。 私たちはあなたの使い方を理解するのを助けるために尽力しました。 app を以下の4つの簡単なステップでコンピュータにインストールしてください:
OK。 最初のものが最初に。 お使いのコンピュータでアプリケーションを使用するには、まずMacストアまたはWindows AppStoreにアクセスし、Bluestacksアプリまたは Nox App Web上のチュートリアルのほとんどはBluestacksアプリを推奨しています。あなたのコンピュータでBluestacksアプリケーションの使用に問題がある場合は、簡単にソリューションをオンラインで見つける可能性が高くなるため、推奨するように誘惑されるかもしれません。 Bluestacks PcまたはMacソフトウェアは、 ここ でダウンロードできます。.
これで、インストールしたエミュレータアプリケーションを開き、検索バーを探します。 一度それを見つけたら、 Moleskine, for Creative Cloud を検索バーに入力し、[検索]を押します。 クリック Moleskine, for Creative Cloudアプリケーションアイコン。 のウィンドウ。 Moleskine, for Creative Cloud - Playストアまたはアプリストアのエミュレータアプリケーションにストアが表示されます。 Installボタンを押して、iPhoneまたはAndroidデバイスのように、アプリケーションのダウンロードが開始されます。 今私達はすべて終わった。
「すべてのアプリ」というアイコンが表示されます。
をクリックすると、インストールされているすべてのアプリケーションを含むページが表示されます。
あなたは アイコン。 それをクリックし、アプリケーションの使用を開始します。
PC用の互換性のあるAPKを取得
| ダウンロード | 開発者 | 評価 | スコア | 現在のバージョン | 互換性 |
|---|---|---|---|---|---|
| APKを確認してください → | Moleskine Srl | 0 | 1.6 | 4+ |
ボーナス: ダウンロード Moleskine, iTunes上で
| ダウンロード | 開発者 | 評価 | スコア | 現在のバージョン | アダルトランキング |
|---|---|---|---|---|---|
| 無料 iTunes上で | Moleskine Srl | 0 | 1.6 | 4+ |
Windows 11でモバイルアプリを使用するには、AmazonAppstoreをインストールする必要があります。 設定が完了すると、厳選されたカタログからモバイルアプリを閲覧してインストールできるようになります。 Windows 11でAndroidアプリを実行したい場合は、このガイドが役立ちます。.


Gmail - Google のメール

Yahoo!メール
Google ドライブ - 安全なオンライン ストレージ

TimeTree [タイムツリー]
Google スプレッドシート
Microsoft Outlook

シンプルカレンダー :スケジュール帳カレンダー(かれんだー)
Microsoft Excel
Google カレンダー: 予定をスマートに管理する

Microsoft Word

Widgetsmith
Google ドキュメント: 同期、編集、共有

Microsoft Authenticator

シフトボード:バイトの給料計算とシフト管理
Microsoft PowerPoint
 PcMac 日本語