Last Updated by Dataman on 2024-11-27
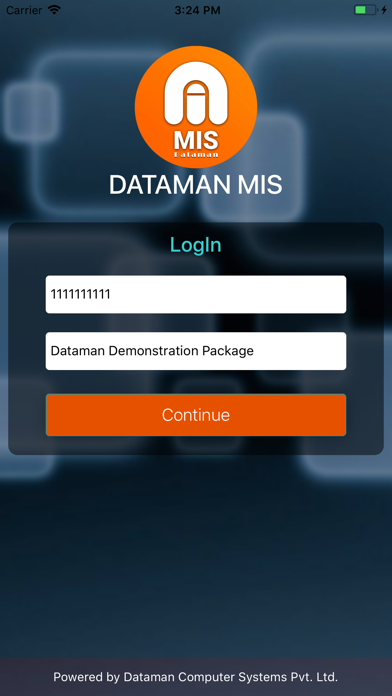
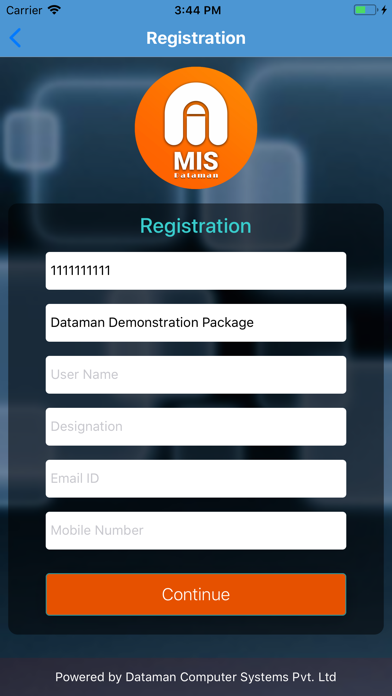

1. After the Login is made the screen which appears to be in front is the registration page, here to be make a user as a registered user the user will be needed to provide the Serial Key, Site Code, Name, Email, Phone number & then will click on the Sign In button.
2. In the details page there is also a refresh option available present on the top right of the screen by clicking on which the user will be able to view the latest updated information.
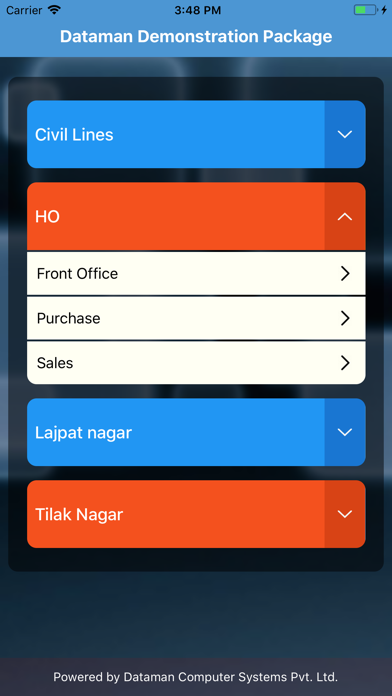
3. Once the registration is made the Dashboard screen appears on the top of which the company name will be displayed & this page will show the branches related to that company.
4. On the Dashboard screen itself the branches are displayed by clicking on any of them the department of respective branch will be shown.
5. The first & foremost will be the Login screen, where the user will be required to enter the credentials like “Serial key & Site Code”.
6. To view the details of any department click on the respective department i.e. to view the details of the sales department click on the sales department icon.
7. Only on providing the above credentials the user will be forwarded to the Registration Page.
8. There is no restriction on the limit of branches the company have it will display all of them.
9. Here the details that will be shown as like net cash, net payment & many more.
10. Liked Dataman MIS? here are 5 Business apps like Credit Card Terminal & Reader; vTie Premium - tie a tie guide with style for occasions like a business meeting, interview, wedding, party; Docs To Go Premium; Birmingham Business Journal; Milwaukee Business Journal;
Or follow the guide below to use on PC:
Select Windows version:
Install Dataman MIS app on your Windows in 4 steps below:
Download a Compatible APK for PC
| Download | Developer | Rating | Current version |
|---|---|---|---|
| Get APK for PC → | Dataman | 1 | 2.0 |
Download on Android: Download Android
 PC Apps