Blurry white frame - Photo pic for social networks for pc and mac

Blurry white frame - Photo pic for social networks for Pc

Written by Valenapps


Get a Compatible APK for PC


Download Developer Rating Score Current version Adult Ranking
Check for APK → Valenapps 1 1 2.0 4+

App Screenshots


Software Features and Description

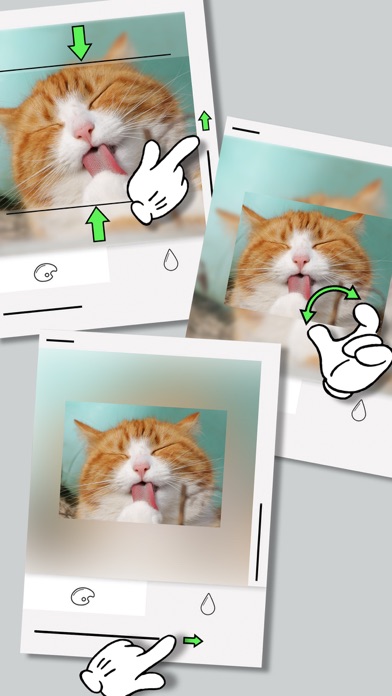
1. Adjust your pictures with white background.You can also use as blank photo frames or profile picture.

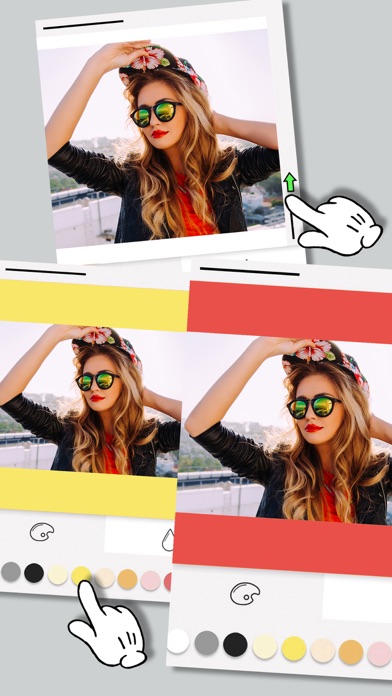
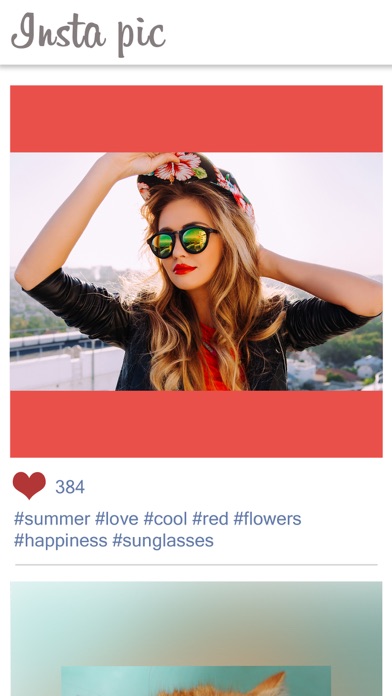
2. Frame your photos with white square, either for your photos of love or birthday or selfies with your friends or just for your fun photos to publish on social networks.

3. Add white border or white background to frame the picture in size of 1080 x 1080.

4. If you are a user of , you'll like this photo editor to put blank photo frames.

5. Liked Blurry white frame? here are 5 Photo & Video apps like WhiteWall AR; Pro BW 360 - Black and White & Vintage Camera and Photo Editor; WHITE BORDER - no crop square fit , insta size pic; BlackCam - Black&White Camera; Black and white Gram;


Download and install Blurry white frame - Photo pic for social networks on your computer


Check for compatible PC Apps or Alternatives


App Download Rating Maker
pc app blurry white frame Get App or Alternatives 1 Reviews
1
Valenapps
Or follow the guide below to use on PC:

Select Windows version:

  1. Windows 7-10
  2. Windows 11

Download and install the Blurry white frame - Photo pic for social networks app on your Windows 10,8,7 or Mac in 4 simple steps below:


  1. Download an Android emulator for PC and Mac:
    Get either Bluestacks or the Nox App >> . We recommend Bluestacks because you can easily find solutions online if you run into problems while using it. Download Bluestacks Pc or Mac software Here >> .

  2. Install the emulator on your PC or Mac:
    On your computer, goto the Downloads folder » click to install Bluestacks.exe or Nox.exe » Accept the License Agreements » Follow the on-screen prompts to complete installation.

  3. Using Blurry white frame on PC [Windows 7/ 8/8.1/ 10/ 11]:
    • Open the Emulator app you installed » goto its search bar and search "Blurry white frame"
    • The search will reveal the Blurry white frame - Photo pic for social networks app icon. Open, then click "Install".
    • Once Blurry white frame is downloaded inside the emulator, locate/click the "All apps" icon to access a page containing all your installed applications including Blurry white frame.
    • Now enjoy Blurry white frame on PC.

  4. Using Blurry white frame on Mac OS:
    Install Blurry white frame - Photo pic for social networks on your Mac using the same steps for Windows OS above.


How to download and use Blurry white frame App on Windows 11


To get Blurry white frame on Windows 11, check if there's a native Blurry white frame Windows app here » ». If none, follow the steps below:


  1. Download the Amazon-Appstore » (U.S only)
    • Click on "Get" to begin installation. It also automatically installs Windows Subsystem for Android.
    • After installation, Goto Windows Start Menu or Apps list » Open the Amazon Appstore » Login (with Amazon account)

  2. For non-U.S users, Download the OpenPC software »
    • Upon installation, open OpenPC app » goto Playstore on PC » click Configure_Download. This will auto-download Google Play Store on your Windows 11.

  3. Installing Blurry white frame:
    • Login to your computer's PlayStore or Amazon AppStore.
    • Search for "Blurry white frame" » Click "Install" to install Blurry white frame - Photo pic for social networks
    • Blurry white frame - Photo pic for social networks will now be available on your windows start-menu.

Minimum requirements Recommended
  • 8GB RAM
  • SSD Storage
  • Processor: Intel Core i3, AMD Ryzen 3000
  • Architecture: x64 or ARM64
  • 16GB RAM
  • HDD Storage

Blurry white frame - Photo pic for social networks On iTunes


Download Developer Rating Score Current version Adult Ranking
Free On iTunes Valenapps 1 1 2.0 4+

Download on Android: Download Android


Similar Photo & Video apps


More apps from the Developer