Published by Stefano Goldoni on 2021-08-07
1. For those who receive the sharing mail: before starting the MenuPlanner app, touch the button "subscribe to the calendar" that appears in the email you received, it will open the system calendar app with an invitation to access the MenuPlanner calendar.
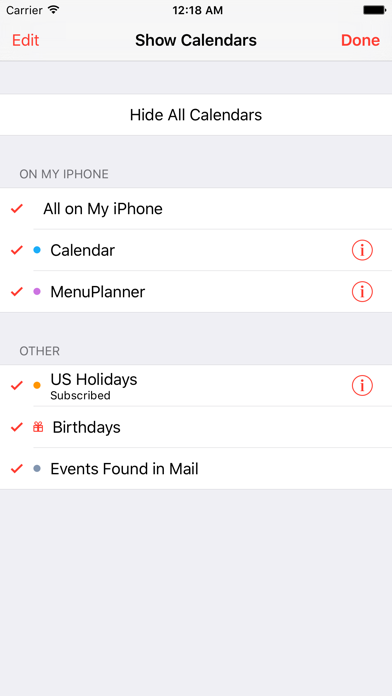
2. Open the system Calendar app, touch the "calendars" at the bottom, tap the circled near the calendar MenuPlanner, in the iCloud section.
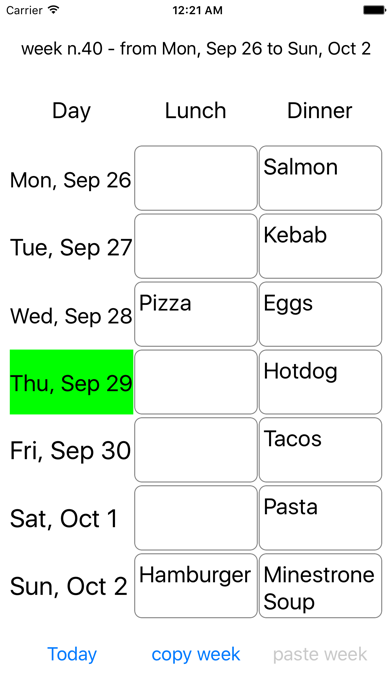
3. By sharing the calendar allow others to see, insert and edit all meals of the week.
4. In the screen that appears, under the title, add all the people with whom you want to share your calendar.
5. To share: launch the app to let it create the MenuPlanner calendar.
6. The App saves lunches and dinners on his iCloud calendar.
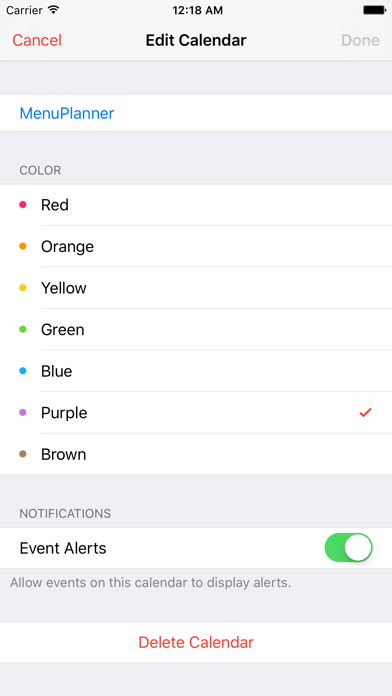
7. If you don't want to be notified whenever someone changes a meal, just turn off the "Show changes" option.
8. If you do not want to be notified before each meal, just turn off the "event alerts" option.
9. They will receive an email containing the instructions for accepting.
10. You will always be updated on what's for lunch or dinner any day of the week.
11. Tap "Sign in".
12. Liked Home Menu Planner? here are 5 Food & Drink apps like ChefChili - Healthy Recipes Cookbook with Menu Planner & Easy Kitchen Guide; Fast Food Secret Menu Guide; BBQ Smoker Sauce Menu Recipes; OkMenu - QR Ordering Menu; Secret Menu for Starbucks!;
Or follow the guide below to use on PC:
Select Windows version:
Install Home Menu Planner app on your Windows in 4 steps below:
Download a Compatible APK for PC
| Download | Developer | Rating | Current version |
|---|---|---|---|
| Get APK for PC → | Stefano Goldoni | 1.00 | 1.2 |
Get Home Menu Planner on Apple macOS
| Download | Developer | Reviews | Rating |
|---|---|---|---|
| Get $0.99 on Mac | Stefano Goldoni | 1 | 1.00 |
Download on Android: Download Android
Please make an English version
 PC Apps