에 의해 게시 BraveCloud
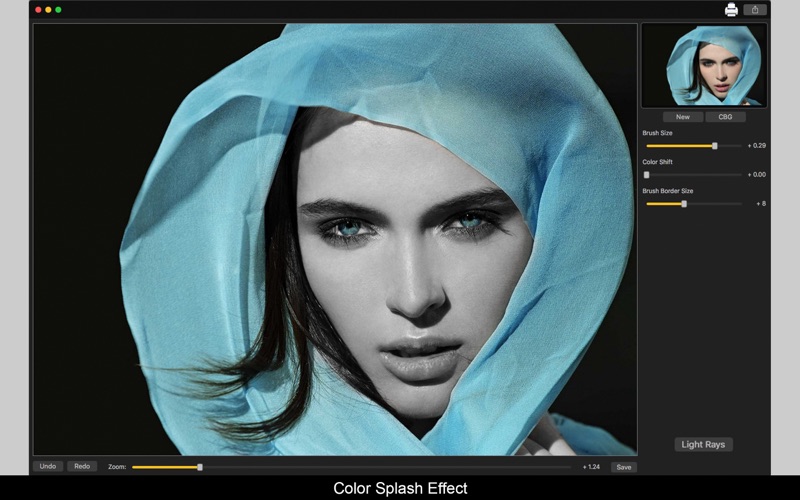
1. Are you trying to give your image a splash effect but find it's very difficult to hit the edges applying the colors on black and white? With Color Splash - Image Editor you can use two types of brush to help you get the exact edges to be colored.
2. If you want to color the image with other colors different from the original image, move the Color Shift slider until you find the color you like.
3. Click [ CBG ] if you want to change the color of your background image (Colored or Black and White).
4. If you don't want to use a black and white background, that's not a problem! You can use the original colors of your image.
5. You can also use the Color Shift option to color your image with different colors from the original image.
6. Use the Zoom slider or your mouse scroll wheel to change the zoom of the image.
7. The 0.00 value corresponds to the original image colors.
8. Click [ New ] to add an image.
9. With our Brush Border, the white border on the circle won't be colored, just the area inside of it, helping you not create distorted colored areas.
10. You can use the [ Undo ] and [ Redo ] buttons (or Command+Z and Command+Shift+Z alike) to undo and redo the changes you did with the brush.
11. It will appear in Black and White.

또는 아래 가이드를 따라 PC에서 사용하십시오. :
PC 버전 선택:
소프트웨어 설치 요구 사항:
직접 다운로드 가능합니다. 아래 다운로드 :
설치 한 에뮬레이터 애플리케이션을 열고 검색 창을 찾으십시오. 일단 찾았 으면 Color Splash - Image Editor 검색 막대에서 검색을 누릅니다. 클릭 Color Splash - Image Editor응용 프로그램 아이콘. 의 창 Color Splash - Image Editor Play 스토어 또는 앱 스토어의 스토어가 열리면 에뮬레이터 애플리케이션에 스토어가 표시됩니다. Install 버튼을 누르면 iPhone 또는 Android 기기 에서처럼 애플리케이션이 다운로드되기 시작합니다. 이제 우리는 모두 끝났습니다.
"모든 앱 "아이콘이 표시됩니다.
클릭하면 설치된 모든 응용 프로그램이 포함 된 페이지로 이동합니다.
당신은 아이콘을 클릭하십시오. 그것을 클릭하고 응용 프로그램 사용을 시작하십시오.
다운로드 Color Splash Mac OS의 경우 (Apple)
| 다운로드 | 개발자 | 리뷰 | 평점 |
|---|---|---|---|
| $9.99 Mac OS의 경우 | BraveCloud | 0 | 1 |
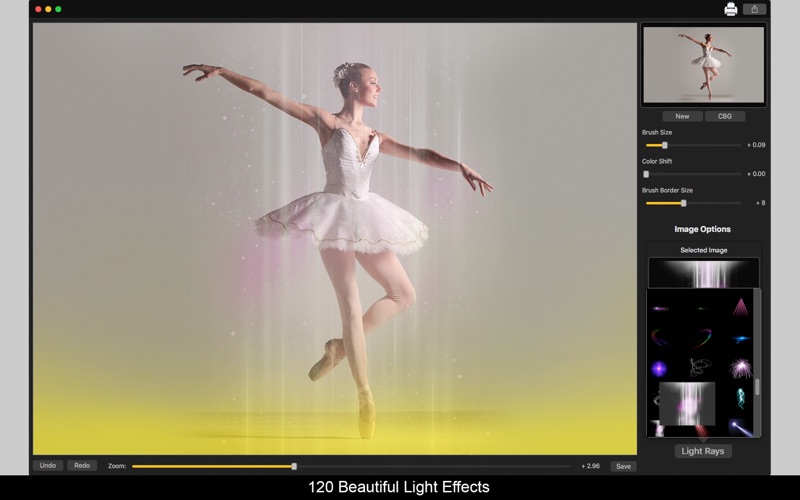
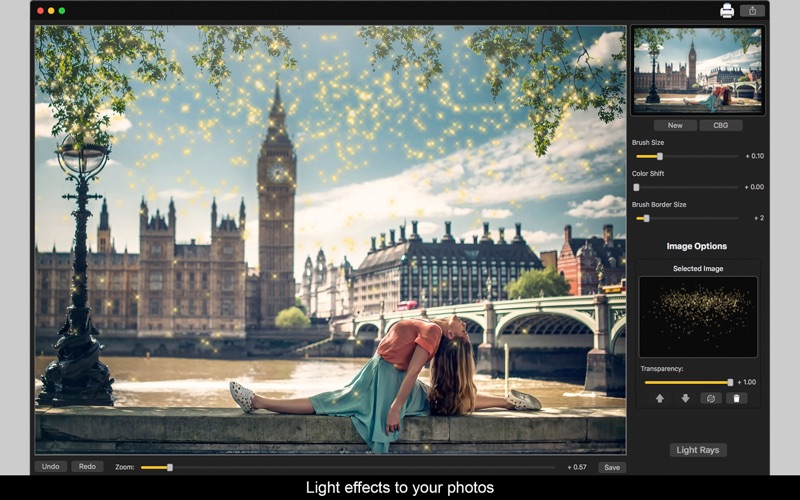
Are you trying to give your image a splash effect but find it's very difficult to hit the edges applying the colors on black and white? With Color Splash - Image Editor you can use two types of brush to help you get the exact edges to be colored. With our Brush Border, the white border on the circle won't be colored, just the area inside of it, helping you not create distorted colored areas. You can also use the Color Shift option to color your image with different colors from the original image. If you don't want to use a black and white background, that's not a problem! You can use the original colors of your image. And not just that! We bring you 120 amazing transparent Light Rays to use on your photo with the size and position you want! The Light Rays will have the transparency level you like, it's just change on the slider! What are you waiting for? Download Color Splash - Image Editor and start designing! •••••••••••••••••••••••••••••••••••••••••••••••••••••••••••• Enjoy our amazing features: •••••••••••••••••••••••••••••••••••••••••••••••••••••••••••• • Splash Effect on your photos. • Two types of Brush: Brush and Brush Border. • Color Shift to use colored brushes. • 120 Transparent Lightrays • Use Black and White or Colored background. • Zoom. • Share on social media. • Print images. • Save Images with PNG, JPEG, JPEG2000, TIFF and BMP formats. •••••••••••••••••••••••••••••••••••••••••••••••••••••••••••• How to use: •••••••••••••••••••••••••••••••••••••••••••••••••••••••••••• 1. Click [ New ] to add an image. It will appear in Black and White. 2. Click [ CBG ] if you want to change the color of your background image (Colored or Black and White). 3. If you want to color the image with other colors different from the original image, move the Color Shift slider until you find the color you like. The 0.00 value corresponds to the original image colors. 4. You can use the [ Undo ] and [ Redo ] buttons (or Command+Z and Command+Shift+Z alike) to undo and redo the changes you did with the brush. 5. Use the Zoom slider or your mouse scroll wheel to change the zoom of the image. 6. Click [ Light Ray ] to add one you like. You can set its transparency using the slider, use backward and forward buttons to change its position on image and use rotation and resize arrows on the lightray you've added to customize it. 7. To delete an Light Ray you've added, select it and click the Thrash button on Image Options. 8. Click [ Save ] button to save your image, choosing between PNG, JPEG, JPEG2000, TIFF and BMP formats. 9. To print your image, you can click on the Printer button. 10. To post your image on social media, you can click on the Share button and choose the social network you want to post.

Enhance Images

Meme Engine: Create your own memes
PSD 2 PNG: Batch convert PSD files to PNG
PSD 2 JPEG: Batch convert PSD files to JPEG

Images 2 JPEG: Batch convert png, psd, bmp, tiff, gif and others images to jpeg

Clockology
Vega - Themes, Icons & Widgets
이비스 페인트 X
테마 메이커 - 아이콘 바꾸기 및 아이폰 위젯 꾸미기

콜라주 메이커: 사진 편집 및 합치기

Sketchbook®

OpenSea: NFT marketplace

사진에 텍스트: 글씨 글쓰기 및 넣기 사진 편집 어플

Clockology Watch Faces

Adobe Fresco: 디지털 드로잉 및 페인팅 앱

CLIP STUDIO PAINT for iPhone

Behance – 크리에이티브 포트폴리오

IconKit - 아이폰 테마 & 위젯 꾸미기

EnhanceFox Photo Enhancer

Fonts Studio Keyboard
 PcMac 한국어