
Publié par Publié par Konstantin Koshelev
1. Student not paid - In this segment of app, user will get the list of students who have not paid for the contribution.
2. Student that paid - In this segment of app, user will get the list of students who have paid for the contribution.
3. Once the details of student is added, user can get the list of students under student that paid or student not paid.
4. Once the app is started, user will get three segments - Add Students, student that paid, student not paid.
5. Here, comes the need to manage the list of students who have paid the contribution or who have not paid the contribution.
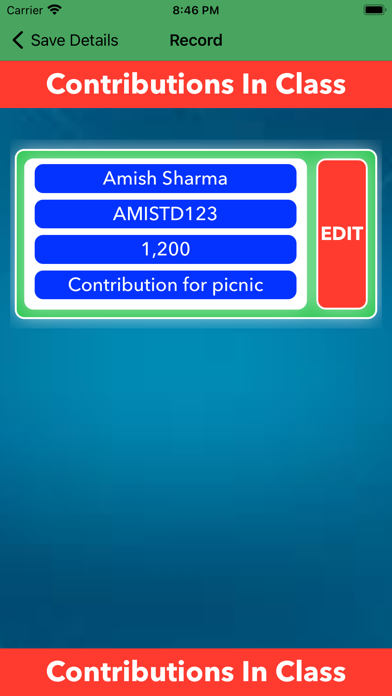
6. On Add Students segment, user will be able to add the details of students.
7. User can edit or update the details of students as and when required.
8. User can delete the details of student when it is not more required.
9. Download the app and manage the details of students for contribution.
10. There are different kind of contributions that happen in every class for different purposes.


Vérifier les applications ou alternatives PC compatibles
| App | Télécharger | Évaluation | Écrit par |
|---|---|---|---|
|
Contributions In Class
|
Obtenir une application ou des alternatives ↲ | 0 1
|
Konstantin Koshelev |
Ou suivez le guide ci-dessous pour l'utiliser sur PC :
Choisissez votre version PC:
Configuration requise pour l'installation du logiciel:
Disponible pour téléchargement direct. Téléchargez ci-dessous:
Maintenant, ouvrez l'application Emulator que vous avez installée et cherchez sa barre de recherche. Une fois que vous l'avez trouvé, tapez Contributions In Class dans la barre de recherche et appuyez sur Rechercher. Clique sur le Contributions In Classnom de l'application. Une fenêtre du Contributions In Class sur le Play Store ou le magasin d`applications ouvrira et affichera le Store dans votre application d`émulation. Maintenant, appuyez sur le bouton Installer et, comme sur un iPhone ou un appareil Android, votre application commencera à télécharger. Maintenant nous avons tous fini.
Vous verrez une icône appelée "Toutes les applications".
Cliquez dessus et il vous mènera à une page contenant toutes vos applications installées.
Tu devrais voir le icône. Cliquez dessus et commencez à utiliser l'application.
Obtenir un APK compatible pour PC
| Télécharger | Écrit par | Évaluation | Version actuelle |
|---|---|---|---|
| Télécharger APK pour PC » | Konstantin Koshelev | 1 | 1.0 |
Télécharger Contributions In Class pour Mac OS (Apple)
| Télécharger | Écrit par | Critiques | Évaluation |
|---|---|---|---|
| Free pour Mac OS | Konstantin Koshelev | 0 | 1 |

Google Chrome

TAC Verif

Caf - Mon Compte

Leboncoin

Amerigo File Manager

Blue Sniff - Simple Bluetooth Detector

Espace Client Bouygues Telecom

EDF & MOI

Orange et moi France

SFR & Moi

QR Code & Barcode Scanner

La Poste – Colis & courrier

Microsoft Edge, navigateur Web

Ma Livebox
 PcMac Français